
Building the Hardware Video
Setting Up the Software Video
Follow these directions to get your device up and running
- Tools Needed:
- Phillips #1 Screwdriver
- Tweezers (Optional)
- Assembly Instructions:
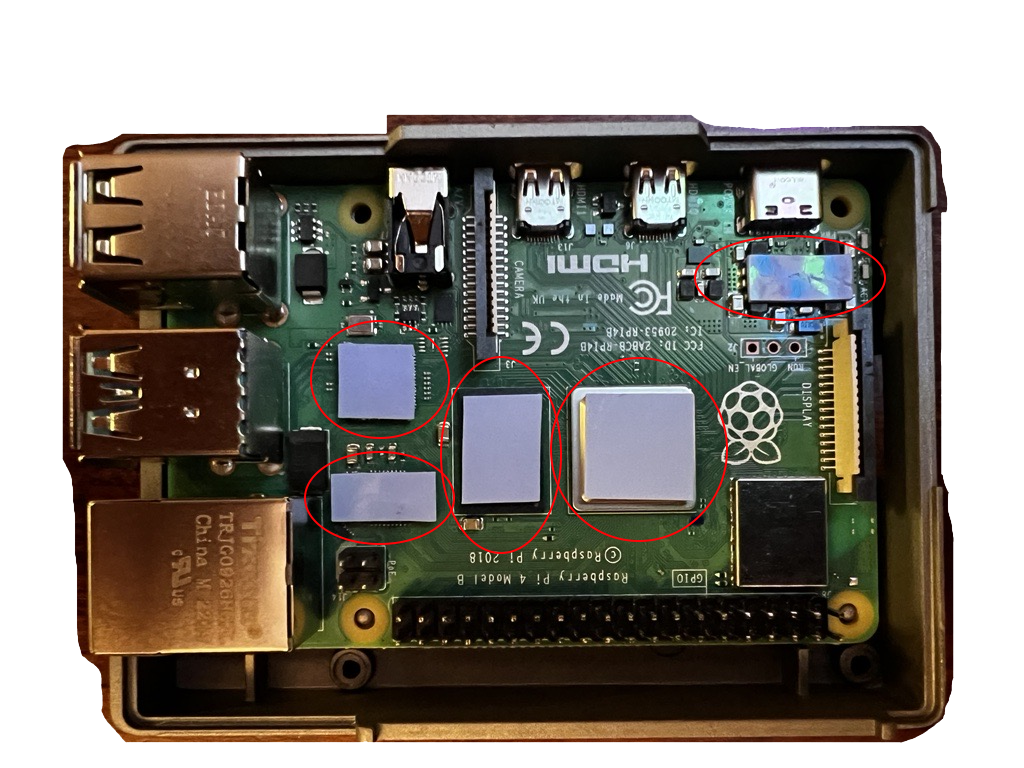
- Assemble Pi case with Raspberry Pi inside aligning up the ports to appropriate openings, see photo below for placement of heat pads or scan the QR code for detailed instructions.
- Plug the Blue SDR into any USB port on the Raspberry Pi
- Attach the included “rubber duck” antenna, antenna should point vertically for best results.
- If you plan on using a wired network connection (Recommended), plug in the network cable.
- Connect the included power supply to the USB-C port and power up the unit.
- If using a wired network connection, skip to step 5.
- Connect to the “ADSBx-config” wifi network that is created about 1-2 minutes after boot if no other connection is detected. You will likely need to tell your device to “stay connected” (android), or “keep using wifi” (iOS). Note, the “ADSBx-config” network is only broadcast for 15 minutes after boot.
- Using a web browser, open: http://adsbexchange.local. (if this does not work for some reason, you can also try http://172.23.45.1)
- Click on “wifi Setup”, select your network and input your password (if you intend to use wifi). The device will reboot and connect to the configured wifi.
- Return to http://adsbexchange.local, and choose “Configure Receiver/Location”. Insert your latitude/longitude coordinates, altitude above sea level, name for the unit, and other information.
More information regarding the software can be found online at http://adsbexchange.com/image